Thursday, December 15, 2011

Green with...Trees?

Wow, where have the days gone? I got so busy with work (end of Q4; always a push), doing a craft fair, making Christmas cards for everybody but myself...

So here I am, staying up past Clint on a Thursday night (as I don't work on Fridays. Snicker, snicker.), crafting away my stresses. Can you think of any better way to re-balance your chi?

So here's this year's Christmas card that I'm sending to all my friends and family. Oh, I suppose I should have listed that as a spoiler alert, but I don't think any of the recipients read this blog anyway, so I suppose it doesn't matter.

The gals over at A Passion For Papertry made this fortnight's challenge a Christmas card featuring green. Now my card definitely has a Simply Chartreuse tree, but to me, this challenge was more along the lines of "how to use 196 pieces of left over 4" x 12" navy card stock from making wedding invitations and favors from Kevin's and Alissa's wedding." I think this year's Christmas cards, and birthday cards...and thank you cards, and baby shower cards, and get well cards...OK, you get the point, but they will surely all feature this lovely textured navy card stock. I still have about 180 pieces left...See the pictures below to realize just how much card stock this is.

So anyway, on to this year's *official* Tremper Christmas Card.

Disclaimer: because the lighting is so bad in my craft room, these have been edited to try to convey the true colors of my card. Santa, please bring me better lights for Christmas!
 Yes, that is a star-shaped brad topping my tree.


In my prototype, I had scarlet ornaments and a scarlet banner with the sentiment across, but I thought the look of the white and vellum was more refreshing, crisp and clean. Love the heavyweight vellum!


OK, so on to that stack of navy card stock? I don't actually know how many sheets are heft, but here is what my stack looks like. I had the pleasure of creating the invitations for my dear friends' wedding this past August. Their colors were navy and lavender and looked SO ELEGANT! However, in order to get the correct quantity of navy card stock, I had to purchase it in bundles of 1/2 smooth and 1/2 textured. So after the invitations were made, I was left with just as much card stock, only textured, as I had just used to make the invitations! So most of those went into making favor boxes where the texture of the card stock didn't matter. However, it resulted in these odd 4" x 12" left over pieces, which I will slowly be making my way through over the next decade...


You can see that my stack is about 1" tall, as my ruled cutting pad has a 1/2" border at the bottom. I'd say that stacks up pretty well. Hah hah; get it? Stacks up! LOL. Oh bother...


So that's that for me tonight. I hope you enjoyed my resurgence into blog land. Don't get used to it.

Cheers!

Tuesday, November 15, 2011

PaperteyInk Make It Monday #41: Essential Glue Pad Tips

Howdy, everybody! I'm back!

Thanks for your patience the last couple of weeks as I worked my way through some pressing things that needed my attention. Now, on to more cards and crafts!

This week's card is a double-whammy, one because I needed a congratulations on the new baby card, and two because I made it fit the PTI MIM challenge.

So I die cut the cutest 'lil whale you;e ever seen, stamped it with my essential glue pad, then added light grey flocking to make it fuzzy!

HOW CUTE IS THIS?


I have to apologize for the terrible lighting. It's Seattle, In November. We only get daylight for like, 8 hours and 16 minutes. So my terrible studio lighting will have to suffice. That and my lack of knowledge of photo editing. But you get the gist of it.

Cheers!
Tuesday, October 18, 2011

A Passion for Papertrey: Sensational Silhouettes!

Hi Ladies and Gents.

If ever there was a day that I needed to come home, relax, and make something pretty, today was the day! What a doozie.

So glad the gals at A Passion For Papertrey had just the tonic; a new challenge! As Aimes so elegantly put it:

"So as another fortnight goes by, we are at the start of the next one and our newest challenge - Sensational Silhouettes. Now don't panic and think "I don't own a PTI set with a silhouette in it"!! Think of flowers, leaves, solid shapes of any kind, dies, etc - all of those could be manipulated in some way to create a silhouette. Let your creative juices run free!!!"

And so my imagination did! Just about every card that comes out of my craft room these days has to be a holiday card, so in keeping with that theme, I though what better silhouette to create than that of a bejeweled Christmas Tree. In my mind, this is a lone tree, standing in a clearing someplace in a forest, but beautifully adorned by Sasquatch or Frankenstein's monster or something. Just sitting there, all by its onesies, waiting for something magical.


What, you think those pearls are too big? Amateur.
Recipe:
Cardstock: PTI Ocean Tides, Enchanted Evening
Stamp: PTI Tree Trimming Trio
Die: PTI Christmas Tree Die
Other: Stickles, adhesive pearls, white gel pen.

Cheeries, Dearies!

Saturday, October 15, 2011

Cards & Art

Hiya, all! Happy Saturday. Here in the T house, we are getting a few projects done, and then heading out and about for some autumn fun. We're headed to a pumpkin patch later today to select our perfect orange nuggets of festive magic.

But first, a two-part post.

First, some cards that I've made lately.

I hate that I have the occasion to make a "Get Well" card, but hopefully this cheery little number helps along the healing process a tough. Colors were inspired by Tiffany Pastor's post about her new baby girls' room decor. You can read about it here. Don't you just love that accordion rosette beneath the ribbon rose?

So I have to confess. When I got the Wreath for All Seasons set last year, I though I was going to use it forever and a day. And I did for about a month, until I got another order in. But in that month, I made all of my Christmas cards with the holly wreath image, and this pretty little number. I don't know about you, but to me, the changing colors of the leaves just makes my heart smile.

This is a new little stamp I randomly picked up last week. Tie stamp is just the "THINKING thoughts of you" part, but I masked it off and repeated the "THINKING" in the different colors first to mimic my first attempt at the ribbon flerus. Thoughts?

I bought this little Autumn Foliage set by Inkadinkadoo the other day. Just a fun little take on the maple leaves and acorns. I love that big, chunky, matte glitter.

Another card from the Autumn Foliage set. Don;t you go ga-ga over those little microbeads on the pumpkin?

Here's a closer look. I first stamped and colored in the pumpkin on the cardstock base, then cut out the shape of the pumpkin in the score-tape sheets, put it on top, then stuck on those magic little glassies, and here's the result! Luminous, if I may say so myself!

And lastly, here's my Hops, who managed to get himself on top of the bookshelf in my craft room. This room is always a work in progress, so there's a little table in front of the shelf that is destined for the Goodwill. I think Hops must have jumped on that first to get all the way up there. I mean, the thing is 6 feel tall! Silly kitty. Appropriately named.

Part Two: What do to with leftover interior house paint:


Last weekend, Clint showed me a video on YouTube of a gal, Amy Shackleton, who makes amazing paintings using paint in a squeeze bottle and a water mister. She lets the paint drip down the canvas at different angles, creating her scenery. We watched the video and just knew we had to do this with the giant canvasses that we have, unused, for our TV room. You can see Amy's video in time lapse here.

So here is our take on the process. We used the loft over colors that we already have elsewhere in the house, and decided on a simple, yet bold design. Horizontal stripes with a burst. We bought 3 little squeeze bottles from Fred Meyer (the kind that restaurants put katsup in), mixed our paint with different amounts of water to get different thicknesses, and starting squirting.

We set up the 3 pieces leaning upright against the sawhorses in the garage to promote the dripping. We used a string to keep our lines straight and help us determine the angles that we thought would work best. The result is definitely weird, but after two years with blank walls down there, I'll take it!

Here's a close up of the center painting. The lights in the room, which is naturally very dark, made it tough to photograph, but you get the gist of it.

Cheers!

Thursday, October 13, 2011

Feathers!!

For those of you who know me, you know about my passion for feathers. Since I was a child, anything that was adorned or born with feathers, I loved. Mom used to have to take me through the lingerie department before a day of shopping, just so that I could see and touch all of the feathers & pretties. Then I would be good all day long.

Well, let's just say this is something that I never outgrew.

And I don't regret it.

Neither does my husband. :-)

So I proceeded to create a feather headband like so many that I have seen in all of the accessory shops in the mall. I wanted mine to be a reflection of me; not just a flat of feathers that sits close to the head. No no, mine needed some spring, it needed flair. (As if feathers on your head wasn't flair enough already?)


And this is what I came up with. It was fun, inexpensive, and easy to make; just a headband ($1.99), ribbon ($1.99) feathers ($7.99, but I got lots of them for this price, enough to make at least 5!), and a hot glue gun. And as you can see, I even dared to wear it at work. Everybody loved it. But especially me. :-)

Now the hard part is deciding what other colors I need. I think all of them will suffice.

Cheeries, Dearies!

Wednesday, October 12, 2011

A Passion for Papertrey: Goin' Geometric!

Hey Everybody! Happy Wednesday. Conditions are perfect... ;-)

Here's my take on the A Passion for Papertrey gals' challenge: goin' geometric. I used the rectangular "Hello, My Name Is..." looking label image from Christmas Labels to stamp my background, then popped one out in a contrasting color for my focal point. "Holly Jolly greetings" sums up the sentiment, a little holly leaves for zing, and voila!


Cheeries, Dearies!

Tuesday, October 11, 2011

Card - a - Palooza!

Hi there, folks! Thanks for checking in on my first *real* post. Real in the sense that there is actually content in this post, and not just my ideas for how this blog will be different from all previous blogs.

So here I have photos of a month's worth of cards. So sit back, relax, and enjoy!

A two-toned anytime card.
Stamps (PTI): Daily Designs, Banner Builder
Cardstock (PTI): Basic Black, Raspberry Fizz, White
Ink(SU!): Basic Black, Versamark
Accessories: Clear embossing powder, Mat Stack #1 Die and Layerz Mat Stack #1 Die, Limitleess Layers 1.5" circle die, Double-Ended Banner Die, Diamond Impression Plate

Candy Cane Christmas:
Stamps (PTI): Candy Cane Christmas, Cupcake Collection, Background Basics: Christmas
Cardstock (PTI): Kraft, White, Dark Chocolate
Ink(SU!): Crumb Cake, Real Red, Island Indigo
Accessories: Candy Cane Christmas dies, Mat Stack #1 Die and Layerz Mat Stack #1 Die, Stickles

Bicyclette Rouge
Stamps (PTI): Unknown Bicycle
Cardstock (PTI): Pure Poppy, Vintage Cream
Ink(SU!): Basic Black
Accessories: SU Stamp & Write Markers

Confetti Birthday
Stamps (PTI): Boy Basics: Simple Circles, Ad Sense
Cardstock (PTI): Stamper's Select White
Ink(SU!): Calypso Coral, Concord Crush, Lucky Limeade
Accessories: Ad Sense Die

Stars & Stripes Birthday
Stamps (PTI): Boy Basics: Simple Circles, Ad Sense
Cardstock (PTI): Stamper's Select White, Simply Chartreuse
Ink(SU!): Lucky Limeade, Pool Party, Island Indigo
Accessories: Ad Sense Die

Starry Day
Stamps (PTI): Star Prints
Cardstock (PTI): Stamper's Select White, Spring Rain
Ink(SU!): Bashful Blue, Island Indigo
Accessories: Fiskars 2: Star Punch
 

Mug o' Joy
Stamps (PTI): Candy Cane Christmas
Cardstock (PTI): Stamper's Select White, Hawaiian Shores, Pure Poppy, New Leaf
Ink(SU!): Island Indigo, Real Red, Crumb Cake, Basic Black
Accessories: Candy Cane Christmas Die, Holly Jolly Die, ModPodge Crystal Glaze

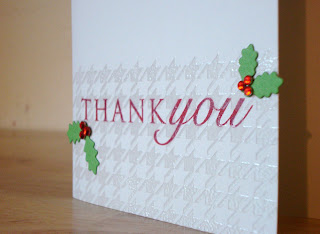
Christmas Thanks
Stamps (PTI): Candy Cane Christmas, Christmas Labels
Cardstock (PTI): Stamper's Select White, New Leaf
Ink(SU!): Real Red, Wild Wasabi, Sweet Blush
Accessories: Christmas Labels Die, Holly Jolly Die, ModPodge Crystal Glaze, Baker's Twine, Kaiser Crystals

Houndstooth & Holly
Stamps (PTI): Think Big Favorites #4, Bacground Basics; Houndstooth
Cardstock (PTI): Soft Stone, New Leaf
Ink(SU!): Real Red, Versamark
Accessories: Holly Jolly Die, clear embossing powder, Kaiser Crystals

Close-up:

CASE'd from www.NicholeHeady.typepad.com

Grateful Mums


Autumn Wishes

Fall Thanks

Cutest 'lil Frankenstein ever!

String up the Lights!

Frosted Pine

Happy Hauntings

Freaky Frank

Mummy Dearest

Punpkin Splendor

Enjoy Life

Friends

Friday, October 7, 2011

Hello. Welcome. Enjoy.

This is the theme of my new blog, designated entirely to my crafty projects and creative endeavors. It always felt a little weird to me, linking my blog post about a card to a website where anyone could click around, find videos of me falling bad-ass zooming down a mountain, complaining about praising my boss, and everything in between. So here, confined within this teensy-weensie corner of the internet, will be my crafting refuge. Not made with my two hands? Doesn't belong here.

I hope you find yourself enjoying the time you spend here on my blog. If you find yourself inspired, leave me a comment, or link to your project.

Cheers!